What do you do next?
Viewing: Prepare for the rescue
Prepare for the rescue
Enable Hallowed Concepts and keep an item with a successful rescue report.
- Look for
- Medkit, Harvester’s Scythe and Cautious Slug have published and player reports. Select what you actually carry below.
- You are done when
- You have checked DLC access and chosen what to carry.
Stuck here?
A teammate can enable shared content, but you need your own DLC to select Acolyte. Do not assume joining their lobby grants permanent ownership.
New run clears this route and carried items. Challenges and saved references stay. Progress stays in this browser.
Before you start
Enable Hallowed Concepts for the run. Keep an item with a successful rescue report—Medkit is a practical starting point. The route below combines the official achievement objective with player and guide reports; it is not a guaranteed shrine-spawn formula.
A teammate can enable the expansion’s shared content. Owning the DLC yourself is still required to select Acolyte. Background achievement recording for non-owners has not been established.
The route, step by step
Player-reported route. The final rescue objective is official; the approach and interaction details come from documented runs.
Prepare for the rescue
Enable Hallowed Concepts and keep an item with a successful rescue report.
Medkit, Harvester’s Scythe and Cautious Slug have published and player reports. Select what you actually carry below.
Check before moving on: You have checked DLC access and chosen what to carry.
Help with this step
A teammate can enable shared content, but you need your own DLC to select Acolyte. Do not assume joining their lobby grants permanent ownership.
Get the N’Tormat and a page
Complete a Trial, then inspect the book and page rewards in the Wake.
Look for a Trial gong. A launch guide also reports a gong in the Bazaar pit as an alternative starting route.
Check before moving on: Your run has the N’Tormat and at least one page, not just the book.
Help with this step
If you have the book but no page, inspect the reward selection after a Trial. Page effects and page acquisition are different steps.
 Related instructions →
Find the Shrine of Descent
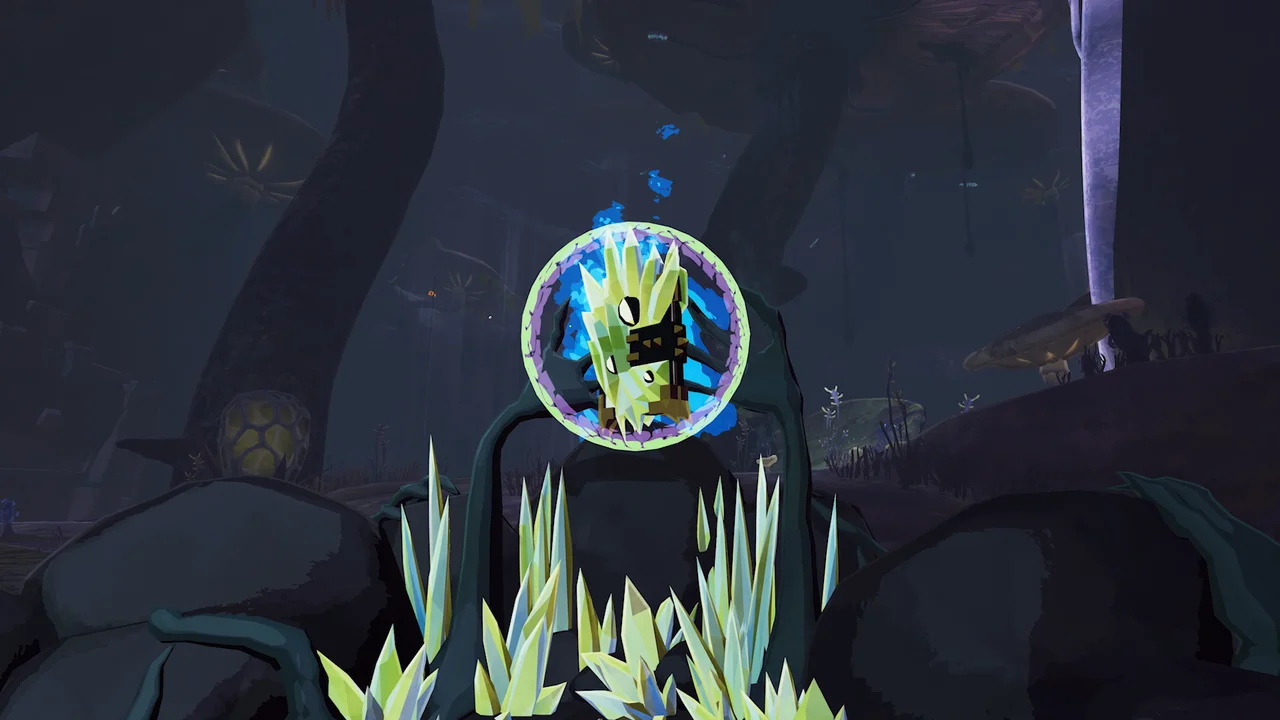
With the book and a page, look for and interact with the Shrine of Descent.
The published route describes a Mountain-like shrine with a floating orb. Look around the stage; the guide does not establish fixed coordinates or a guaranteed spawn.
Check before moving on: You have interacted with the shrine for this route.
Help with this step
Check that you obtained a page as well as the book. A missing shrine alone does not establish a game bug.
Finish the Teleporter event
Complete the Teleporter event and enter the Ritual Portal.
Check the portal that appears after the event on the reported shrine route.
Check before moving on: You have arrived in Soulbound Threshold.
Help with this step
A regular stage exit is not a substitute for the Ritual Portal. Verify which route you are taking before leaving.
Clear Soulbound Threshold
Climb the ramps and activate the encounter console, then complete the waves and boss encounter.
The official scene shows the “Defeat the waves” objective. Follow your current in-game objective rather than a website timer.
Check before moving on: The encounter has finished and you can search for the fallen survivor.
Help with this step
The boss fight is not the rescue. Keep your candidate item until you inspect Acolyte after combat.
Find Acolyte and rescue them
Find Acolyte on the ground after the encounter and check the rescue interaction before leaving.
The launch guide places the survivor near the area you pass toward the exit. Inspect the floor and the interaction prompt; the combat screenshot is not a rescue-location map.
Check before moving on: You have performed the item rescue interaction.
Help with this step
The offered item is reported to be consumed. If you have no supported candidate, review the successful reports below; there is no guarantee of a replacement item in the arena.
Check survivor selection
Check the survivor selection screen for Acolyte and confirm access with your own DLC ownership.
Being able to select the survivor and seeing a platform achievement notification are separate checks.
Check before moving on: You have manually checked the selection screen. This site cannot read your game.
Help with this step
If the survivor is selectable but an achievement did not appear, check your platform’s achievement list and installed version. Reports do not establish a guaranteed fix.
Items for the rescue
Keep an item with a successful report available until the post-encounter rescue. The offered item is reported to be consumed. The list separates published guides from direct player accounts; choosing “I have this” records your inventory for this run.

Medkit
Reported successful rescue
View evidence
Keep a candidate available until you reach Acolyte. The offered item is reported to be consumed.

Harvester's Scythe
Reported successful rescue
View evidence
Keep a candidate available until you reach Acolyte. The offered item is reported to be consumed.

Cautious Slug
Reported successful rescue
View evidence
Keep a candidate available until you reach Acolyte. The offered item is reported to be consumed.

Ben's Raincoat
Reported successful rescue
View evidence
Keep a candidate available until you reach Acolyte. The offered item is reported to be consumed.

Transcendence
Reported successful rescue
View evidence
Keep a candidate available until you reach Acolyte. The offered item is reported to be consumed.

Brainstalks
Reported successful rescue
View evidence
Keep a candidate available until you reach Acolyte. The offered item is reported to be consumed.

Bison Steak
Reported successful rescue
View evidence
Keep a candidate available until you reach Acolyte. The offered item is reported to be consumed.

Leeching Seed
Reported successful rescue
View evidence
Keep a candidate available until you reach Acolyte. The offered item is reported to be consumed.

Topaz Brooch
Reported successful rescue
View evidence
Keep a candidate available until you reach Acolyte. The offered item is reported to be consumed.

Infusion
Reported successful rescue
View evidence
Keep a candidate available until you reach Acolyte. The offered item is reported to be consumed.
Power Elixir
Reported successful rescue
View evidence
Keep a candidate available until you reach Acolyte. The offered item is reported to be consumed.
Defeated the boss, but no unlock?
Check for the fallen survivor before leaving the arena. Reports place the interaction near the exit or where the boss fell; inspect the floor and use the interaction prompt. A boss kill alone does not satisfy “rescue the survivor.”
If no interaction appears, first check whether the encounter is fully complete and whether you have a reported usable item. Record your platform, installed version and run conditions when reporting a problem. The absence of an object alone does not prove a confirmed game bug.
The Reincarnation page and hidden-door encounter are not part of this basic rescue checklist. Acolyte’s Sacrifice skill is a separate mechanic.
Sources & version notes
Reviewed 9 October 2026. Official objectives, previews and player reports are identified separately.
- Epic Games Store — Achievement names and objectives
- Gearbox / 2K on Steam — About This Content
- Syed Hamza Bakht / Prima Games — Unlock steps and healing item list
- Wibittt and r/riskofrain contributors — OP and first-person success comments
- r/riskofrain contributors — Unlock discussion replies